Page 1 of 1

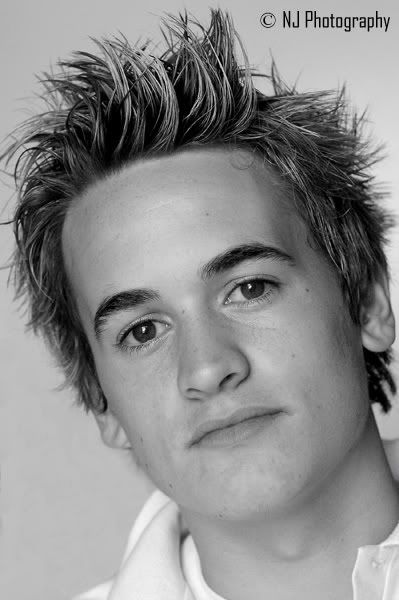
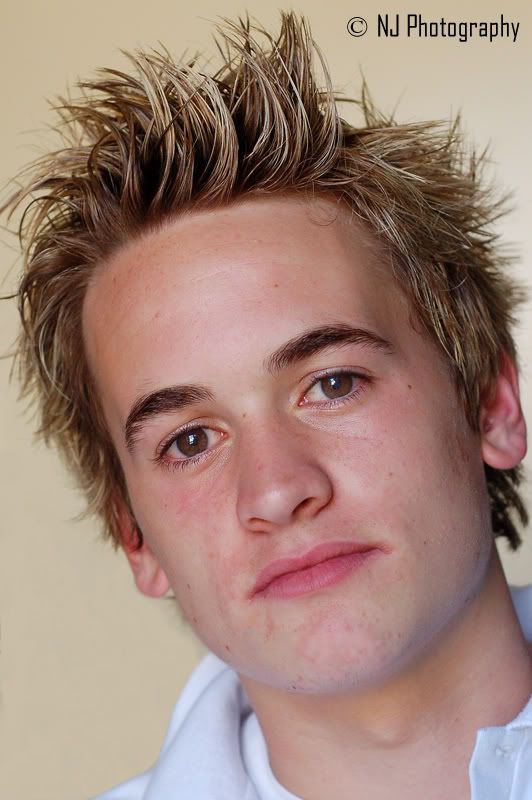
2nd try at a portrait

PostPosted: Thu Nov 09, 2006 8:23 pm
by NJ
so yeh, i dragged my mate to my place today so i could have a second attempt, im quite pleased with this.

i kept all things in mind, hopefully it is an improvement on the 1st. C&C more than welcome!

Manual 50mm, 1/60, f4 800iso
Image

and black and white just for kicks
Image

thanks for all your help :)

PostPosted: Thu Nov 09, 2006 8:37 pm
by Oz_Beachside
Hi,
Great steps forward!

Lighting much more even, great catchlights (nice natural with everyday character, rather then pure flash), and DOF is nice, with hair on back of head our of focus.

Cheers
Oz

PostPosted: Thu Nov 09, 2006 8:58 pm
by casnell
Well done, big improvement. I especially like the B/W treatment.

There's a lot of good advice on here, really interesting c+c on that first one from everyone, thank you !

PostPosted: Thu Nov 09, 2006 9:01 pm
by NJ
thanks guys!
god i love this forum, i would be nowhere with out all you guys!

PostPosted: Thu Nov 09, 2006 9:23 pm
by phillipb
Definite improvement, specially the B&W.
Now, if only you can get your mate to comb his hair :wink: :lol:

PostPosted: Thu Nov 09, 2006 9:39 pm
by casnell
phillipb wrote:Definite improvement, specially the B&W.
Now, if only you can get your mate to comb his hair :wink: :lol:

And stand up straight!

PostPosted: Thu Nov 09, 2006 9:41 pm
by NJ
haha nah he was sitting down, but thats more of a natural him than sitting up straight. plus he wanted to look cool for his myspace acount :P

PostPosted: Thu Nov 09, 2006 11:36 pm
by rflower
yes definitely agree. This is much better. I like the BW shot the best.

Russell.

PostPosted: Fri Nov 10, 2006 5:45 am
by Aussie Dave
NJ,
Look at you go....nicely done.

Are you able to tell us all how you set this shot up ? I'm sure many would be interested to hear what you did.

The focus on the eyes is spot on and the sharpness of the lens really shines through now.

Great to see the improvement. Looking forward to seeing more images and further improvement :)

And yes, I agree....this forum is such a great place to learn from. With so many depths of experience, talent and points-of-view, everyone has something to contribute and something to learn.

PostPosted: Fri Nov 10, 2006 9:02 am
by Alpha_7
NJ, you took your first shot and made it 20 times better, excellent stuff thats a great improvement, and a really cracker of a shot now.

PostPosted: Fri Nov 10, 2006 10:43 am
by NJ
thanks very much guys! :D

good idea dave, i'll give more details...

It was the same light source as the first shot, that being a window for natural lighting, but this time i made him face the window instead of just the side of his face, for even lighting on both sides.
There was a doorway behind where he was sitting so i closed the door to provide a plain backgound as i dont have anything else to do that with.
I made sure luke (the subject :P) looked right into the lens to create a good sense of eye contact and then made sure the focus was really on the eyes as thats usually the first thing that engages the viewer.
In photoshop i cropped it a bit to improve the composition, cloned out the door handle and door frame, and sharpened it. I also played with curves and contrast to get the colurs right.

hope thats a help, thanks.

PostPosted: Fri Nov 10, 2006 12:28 pm
by Aussie Dave
Thanks for the run-down NJ.

Next time, try and setup your subject as you did in your 1st attempt, with the window lighting one side of his face and use the flash on the other side, to fill-flash.....to see what sort of effect this will give you

There is nothing wrong with how you attempted your 2nd version....this is just a suggested variation.

Sometimes, to get the background you want, you cannot turn your subject towards the sun (or light source) to even the lighting, so learning how to use fill-flash in these situations can be of great benefit (eg. outside in harsh sunlight)

I'd be interested to see what you come up with.......next time you get the chance (of course) :wink:

PostPosted: Fri Nov 10, 2006 8:27 pm
by NJ
i dont think i'd be able to use fill flash as i only have the on board flash and that would discard all the natural light, wouldnt it?

i do want to look at getting some sort of reflecter though...

thanks for the tips dave! :)

PostPosted: Fri Nov 10, 2006 10:03 pm
by phillipb
NJ wrote:i dont think i'd be able to use fill flash as i only have the on board flash and that would discard all the natural light, wouldnt it?

i do want to look at getting some sort of reflecter though...

thanks for the tips dave! :)


Not necessarily Nathan, if you turn the camera to vertical with the pop-up flash on the side of the shadow (in your case on the left) and reduce the flash output to 1/4 or less, you may be able to get away with it.
You're right though, Ideally you need an off camera flash.

PostPosted: Sat Nov 11, 2006 11:00 am
by Biggzie
Not necessarily Nathan, if you turn the camera to vertical with the pop-up flash on the side of the shadow (in your case on the left) and reduce the flash output to 1/4 or less, you may be able to get away with it.
You're right though, Ideally you need an off camera flash

Another trick I have used is taping a folded tissue over the pop-up flash. This softens it and cuts the output a little especially if you fold more layers over the front of the flash.
On my older film camera I could pop up the flash and still connect an external flash which I could use as a bounce or connect my flash extention lead to get an extra 1.5 meters distance.
Unfortunately I cant do that with my digital body because the hotshoe blocks the pop-up from lifting.

PostPosted: Sat Nov 11, 2006 11:55 am
by NJ
phillip, i had not thought of that, lol, and now i see how it can work!

and thanks for that tip biggzie, definately worth trying!