Composition and Post Processing comments welcome.
Some things I can note is the blown highlights. Also the pic seems a little busy...do you agree?
Anything else?
Thanks
Paul
A discussion forum - and more - for users of Digital Single Lens Reflex cameras.
Big Butt (ress)Moderators: Greg B, Nnnnsic, Geoff, Glen, gstark, Moderators
Forum rules
Please note that image critiquing is a matter of give and take: if you post images for critique, and you then expect to receive criticism, then it is also reasonable, fair and appropriate that, in return, you post your critique of the images of other members here as a matter of courtesy. So please do offer your critique of the images of others; your opinion is important, and will help everyone here enjoy their visit to far greater extent. Also please note that, unless you state something to the contrary, other members might attempt to repost your image with their own post processing applied. We see this as an acceptable form of critique, but should you prefer that others not modify your work, this is perfectly ok, and you should state this, either within your post, or within your signature. Images posted here should conform with the general forum guidelines. Image sizes should not exceed 950 pixels along the largest side (height or width) and typically no more than four images per post or thread. Please also ensure that you have a meaningful location included in your profile. Please refer to the FAQ for details of what "meaningful" is.
Previous topic • Next topic
8 posts
• Page 1 of 1
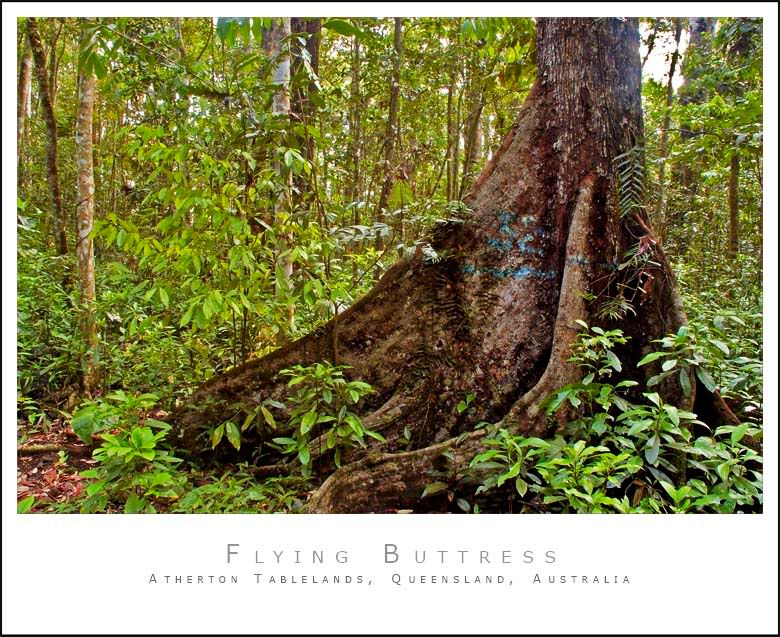
Big Butt (ress)
Can anyone comment on my Big Buttress Root?
Composition and Post Processing comments welcome. Some things I can note is the blown highlights. Also the pic seems a little busy...do you agree? Anything else?
Thanks Paul http://www.australiandigitalphotography.com
Living in poverty due to my addiction to NIKON... Is there a clinic that can help me?
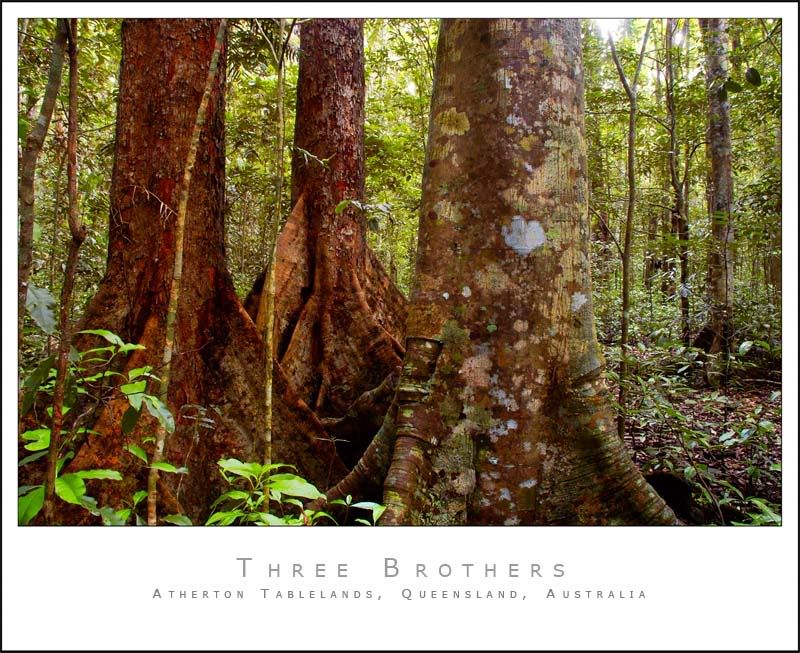
and another...
 http://www.australiandigitalphotography.com
Living in poverty due to my addiction to NIKON... Is there a clinic that can help me?
G'day NU,
The first is a little busy for me, as they are I prefer the second shot as it seems to demand more attention from the viewer on the stumps (well it does for me anyway I think maybe if you burned, or applied some gentle darkening curves or maybe a very slight blurring to the background(s) that may help to centre the viewers focus on your subjects? The subjects seem to compete with all the greenery in the background... Aka Andrew
I did a quick and dirty layer mask and lens blur (Loving my new graphics tablet!!).
Very dirty around the edges... but just a sample to see what you think: 
Or something a little different  http://www.australiandigitalphotography.com
Living in poverty due to my addiction to NIKON... Is there a clinic that can help me?
Ahhhh, the first of the two reposted images really grabs me, the stumps are almost jumping out at me
The second just seems, ummm, dunno, maybe if the background was desat'ed but just a little bit rather than B&W maybe? PP is fun and it's good to toss around ideas huh... The lens blur is a really cool filter eh? When you apply the mask, use a gradient to paint the mask then (to get a nice smooth transition), blur it a smidge and you can really get a good DOF effect... It's cool... Aka Andrew
How do I use a gradient to paint the mask? Currently I just use the paintbrush tool
The second of the reposted images was just the background desaturated. Just something I thought I'd try in 10 secs or less http://www.australiandigitalphotography.com
Living in poverty due to my addiction to NIKON... Is there a clinic that can help me?
Just make a selection of what you want to apply the filter to (any type of filter) and use that selection within the mask to apply the gradient to... Photoshop is so powerful there's a gazillion ways to skin a cat (ooops, sorry cat people), this is just one way... Duplicate your original background layer, then make your selection (of what you want to apply the filter to) using the duplicated layer (doing this on the duplicated layer means you can see what you're selecting and the effect is only on that layer so you can play with the opacity of the filtered layer, all without affecting the original), then apply a mask to that dupicated layer (by clicking the little "camera" icon at the bottom of the layers pallette), select the mask itself (ie: click on the little white mask window next to the layer) and then apply the gradient tool which will be restricted by the selection. The start and end of the gradient is determined by the start and end point of the line you use to direct the gradient You can then add additional blurring to the result if you wish to smooth more... Also, if you only want to see the mask itself rather than the image (say if you want to manually paint it), just alt-click on the mask window itself in the layers pallette. Filters only apply to white areas of a mask... In the mask you can always re-paint the white and black areas with a paintbrush to determine/change where the mask takes effect, you can always change it later... This is typed quickly I hope I've got this right and explained it OK Aka Andrew
Previous topic • Next topic
8 posts
• Page 1 of 1
|


